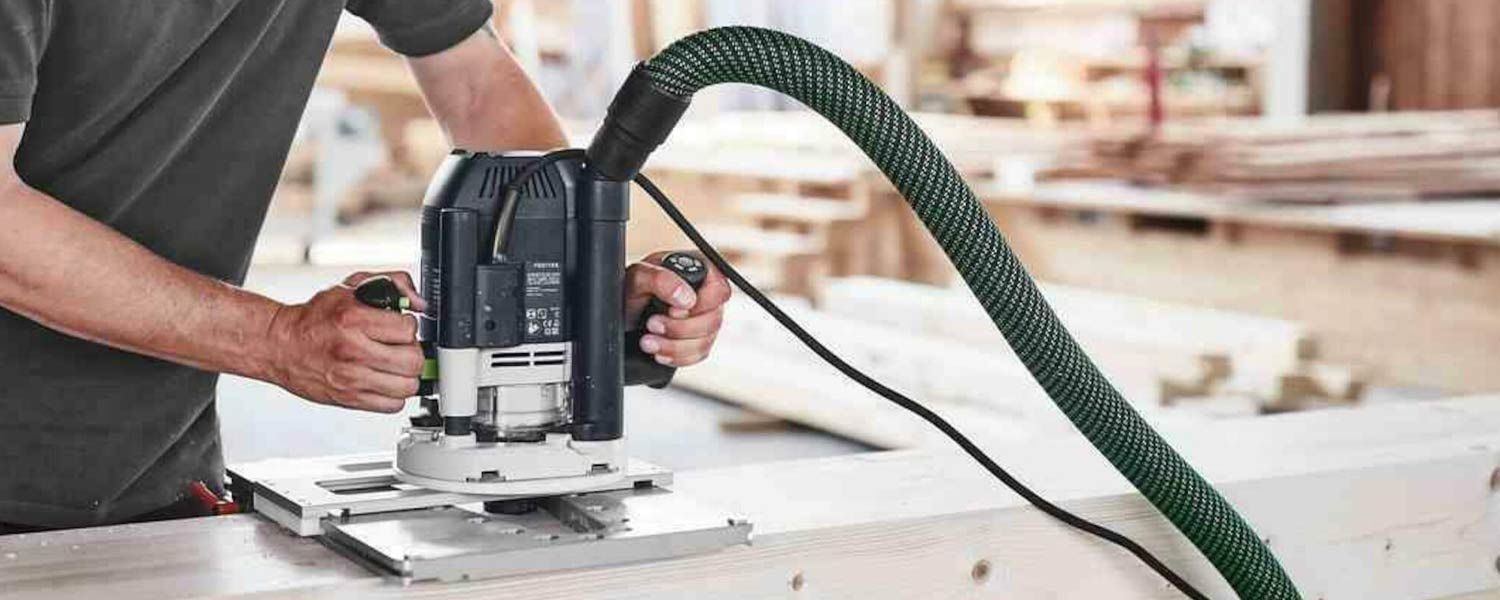
Working with a Router: Technique, Settings, and Safety
Clean grooves, crisp edge profiles, and precise joinery are achieved with a router through controlled guidance and correct machine settings. When routing by hand, you generally feed the machine against the direction of the bit’s rotation (conventional routing). This maintains control and prevents the tool from pulling unpredictably across the workpiece.
To avoid scorched wood and motor overload, material is best removed incrementally in passes of 3 to 5 millimetres. The speed must be matched to the diameter of the router bit: the larger the diameter, the lower the speed should be set to prevent overheating.
Selection guide: Trim router or plunge router and the right collet
When selecting a router, you essentially choose between two machine types: a compact trim router (also known as a palm router) or a full-sized plunge router.
A trim router is lightweight, compact, and can be guided with one hand. This type is primarily designed for chamfering or rounding over edges, cutting shallow rebates, and light profiling. A plunge router features a spring-loaded base on two guide columns. This allows you to plunge the spinning bit smoothly into the middle of a workpiece, which is ideal for mortises, grooves, cutouts, and heavier joinery.
Alongside the machine type, the collet capacity plays a decisive role:
- 6 mm collet: Found on compact trim routers and entry-level models. Suitable for fine detailing, though the thinner shank flexes more easily under heavy lateral loads.
- 8 mm collet: The most common all-round standard in Europe for both professionals and demanding DIYers. It provides ample rigidity for straight bits, dovetail joints, and medium-diameter profiles.
- 12 mm (or imperial 1/2-inch / 12.7 mm) collet: Standard on heavy-duty routers rated from roughly 1,600 to 2,300 watts. The thicker shank creates significantly less vibration during deep trenching, flattening solid hardwood, or cutting wide profiles. Note: 12 mm and 1/2-inch (12.7 mm) collets and shanks are not interchangeable.
Always check the shank size carefully when buying router bits. A bit with a 6 mm shank will not fit securely into an 8 mm collet unless you use a manufacturer-approved reduction sleeve.
Fitting a bit and preparing the machine
Always disconnect the mains plug or remove the battery before fitting or changing a bit. An accidental startup carries severe safety risks.
Clean the inside of the collet and the bit shank with a dry cloth. Resin buildup or sawdust trapped between clamping surfaces causes runout, resulting in a rough cut and accelerated bearing wear.
Insert the router bit shank into the collet at least up to the marked insertion line (often an engraved ‘K’ or arrow on the shank). If this marking is missing, insert the shank at least three-quarters of the way into the collet. Do not bottom out the bit completely in the spindle; leave approximately 2 millimetres of clearance. If the bit rests against the bottom, the collet cone can bind when tightened, reducing its clamping force.
Engage the spindle lock and tighten the collet nut securely using the supplied spanner. Avoid excessive force; a clean collet clamps reliably under the specified torque without overtightening.
Never tighten the collet nut without a bit inserted in the collet. Doing so can distort or damage the clamping cone.
Setting the routing depth with the turret stop and fine adjustment
A correct depth setting prevents the tool from stalling or scorching the timber. Routers feature a depth stop rod paired with a stepped turret stop and a micro-adjustment screw for precise calibration.
Setting the zero point and desired cutting depth takes four steps:
1. Zeroing the cutter
Place the machine on a flat surface or directly onto the workpiece. Unlock the plunge mechanism and push the router down until the tip of the bit just makes contact with the surface. Lock the plunge lever in this position.
2. Lowering the stop rod
Rotate the stepped turret so that the lowest step sits directly below the depth stop rod. Loosen the rod’s clamping screw and let the rod rest against this lowest step. Set the zero-point pointer or the sliding scale on the rod to exactly “0”.
3. Setting the final depth
Raise the stop rod until the scale indicates the desired total finished depth (for example, 12 mm) and retighten the clamping screw. Then release the plunge lever so the motor housing springs back up.
4. Routing in incremental passes via the turret
Now rotate the turret stop so that the highest step is positioned beneath the rod. When you plunge the machine until the rod hits this step, the bit cuts only the first shallow pass (for example, 4 mm deep). For the next pass, click the turret to the next step down, until the final pass reaches the full 12 mm depth on the lowest setting. The micro-adjustment screw on top of the rod allows fine-tuning down to fractions of a millimetre.
Feed direction: Conventional routing and proper feed rate
Viewed from above, the router spindle turns clockwise. To cut smoothly and maintain control, the feed direction must oppose the rotational force of the cutting edge. This is known as conventional routing.
In conventional routing, the cutting forces pull the machine steadily against the stock and the guide fence. If you move in the same direction as the rotation (climb routing), the cutter tends to “walk” or grab, propelling the tool uncontrollably forward. This poses serious safety hazards and easily ruins the workpiece.
Follow these feed direction rules:
- Outside edges of a workpiece: Move the router anti-clockwise around the perimeter. The cutting action will naturally pull the tool inward against the edge of the wood.
- Internal cutouts (such as an opening using an inside template): Move the router clockwise. Because you are working on the inside face, this direction ensures conventional cutting.
- Straight grooves using a parallel edge guide: Feed the router so that cutter rotation pulls the base towards the fence, rather than pushing it away. This generally means feeding from left to right when the fence is on the side facing away from you.
In specific situations—such as preventing tearout in woods with reversing grain—experienced woodworkers occasionally use a very light “climb cut” of less than 0.5 mm. Only attempt this with sufficient experience, maintaining a firm two-handed grip on the tool at all times.
Matching speed to bit diameter and wood type
The speed at which the cutting edge passes through the timber (the peripheral cutting speed) depends on both the spindle RPM and the diameter of the cutter. A small 6 mm straight bit running at 20,000 RPM has a relatively modest peripheral speed. A large 40 mm panel-raising or roundover bit reaches a drastically higher rim speed at that same RPM.
If a large bit spins too fast, friction builds up rapidly, burning the wood and dulling the carbide (TCT) edges. If a bit runs too slowly, chatter marks and tearout occur because the cutters chip away at the wood rather than shearing it cleanly.
Use the following guidelines to set the appropriate speed:
| Bit diameter | Maximum recommended speed | Suitable woods and materials | Setting notes |
|---|---|---|---|
| Up to 12 mm | 20,000 – 27,000 RPM | Softwood, MDF, plywood, chipboard | High speed delivers a clean, smooth groove finish. |
| 12 to 25 mm | 16,000 – 20,000 RPM | Hardwood (oak, beech), solid softwood | Medium speed limits heat buildup in the core. |
| 25 to 40 mm | 12,000 – 16,000 RPM | Solid hardwood, plastics, engineered boards | Lower speed prevents burn marks on wide edge profiles. |
| Over 40 mm | 8,000 – 12,000 RPM | Stationary router tables or heavy-duty machines only | High rotational mass requires low speeds for balance and stability. |
In addition to spindle speed, keep your feed rate steady. Pausing in one spot while the bit is spinning will instantly scorch the timber.
Using guides: Parallel fence, guide rail, and template guide
Freehand routing rarely produces straight, true lines. Precise, repeatable work requires dedicated guiding systems.
Parallel edge guide
The parallel edge guide slides into the router base using two guide rods. It is used to cut straight grooves or profiles parallel to a straight reference edge. Apply gentle inward pressure against the workpiece’s reference face during the pass to prevent the router from drifting outward.
Guide rail
When routing grooves across the middle of large sheet goods, an edge guide often lacks the necessary reach. In these cases, clamp a straight guide rail or an aluminium straightedge to the panel. Use a rail adapter, or run the flat edge of the router base directly along the rail. Ensure the bit rotation draws the router towards the guide rail as you advance.
Template guide and template
A template guide (guide bush) tracks along the contours of a template or jig to duplicate complex shapes accurately. Mounted centrally in the base plate, the metal collar surrounds the bit. Because the guide bush is wider than the bit itself, an offset exists between the template and the finished cut.
The formula for calculating this template offset is: Offset = (Outer diameter of guide bush - Bit diameter) / 2.
Calculation example: Using a 30 mm guide bush with a 12 mm straight bit yields an offset of: (30 - 12) / 2 = 9 mm. The template must therefore be made exactly 9 mm smaller (for external profiles) or 9 mm larger (for internal cutouts) than the desired finished component.
Common practical mistakes and troubleshooting
Routing errors show up immediately in the cut quality. The table below helps identify and resolve the most common issues:
| Problem | Possible cause | Practical solution |
|---|---|---|
| Dark scorch marks on the wood | Feed rate is too slow, speed is set too high, or the bit is coated in baked-on resin. | Increase your feed rate, dial down the speed by 1 to 2 settings, and clean the cutting edges with resin remover. |
| Tearout on corners (end grain) | The bit exits across the end grain unsupported at the end of the cut. | Follow the correct routing sequence: rout the end-grain sides first, then the long-grain edges. Alternatively, clamp a scrap backing board flush to the exit edge. |
| Rippled or chattered surface finish | Too much material removed in one pass, loose collet, or irregular feed rate. | Reduce depth per pass to 3–4 mm. Check that the collet is tightened properly and feed the router at a steady pace. |
| Machine lurches or pulls erratically | Accidental climb cutting, or the router base is tipped and rocking. | Check your feed direction (use conventional feed) and support the base by clamping an auxiliary support batten alongside the cut. |
To prevent blowout on fragile corners, adopt a standard routing sequence. When profiling a solid panel, rout the two end-grain edges first (across the grain). Any minor tearout at the exit corners will then be cleanly sliced away when you subsequently rout the two long-grain sides.
Working safely with a router
Routers spin at speeds up to 27,000 RPM. Safe working habits and a stable setup are essential to prevent accidents.
Always secure the workpiece firmly to a solid workbench with clamps. Never hold the workpiece with one hand while operating the tool with the other; keep both hands firmly on the router handles.
Wear suitable personal protective equipment:
- Hearing protection: Routers generate high decibel levels under load, which can rapidly cause irreversible hearing damage.
- Safety glasses: High-speed chips and splinters are ejected forcefully.
- Dust mask (at least FFP2): Fine dust from MDF, hardwoods, and plywood contains bonding resins and fine particulates harmful to the respiratory system.
- Dust extraction: Connect a suitable workshop vacuum to the base’s extraction port. This keeps the cut line visible and reduces airborne dust.
Never wear loose clothing, jewellery, or gloves while routing, as rotating spindles can snag loose fabric instantly. Once a cut is complete, always wait for the bit to come to a complete stop before lifting the tool clear or setting it down.
Frequently asked questions about working with a router
How deep can you rout in a single pass?
As a practical rule of thumb, cut no deeper per pass than half the bit diameter, with a standard maximum of 3 to 5 millimetres. In dense hardwoods such as oak or beech, aim for passes of 2 to 3 millimetres to prevent bit overheating and motor strain.
Why does the wood burn during routing?
Burn marks stem from excessive friction. The primary culprits are a feed rate that is too slow (dwelling in one spot), spindle speed set too high for the cutter diameter, a dull bit, or attempting to hog out too much material in a single pass.
When should you choose an 8 mm or a 12 mm collet?
An 8 mm collet is ideal for general joinery, edge profiling, slotting, and dovetailing. A 12 mm collet is preferred for heavy-duty profiling, deep mortising (such as multi-point lock recesses), and large-diameter bits. The thicker shank provides superior torsional stiffness and cuts down on vibration.
Can I cut hinge recesses with a router?
Yes. Use a straight bit with bottom-cutting carbide edges. Clamp a simple timber jig to the door or frame and run a guide bush along the jig opening to mortise out the hinge leaf pocket to the exact depth of the hinge flap. Finish the rounded corners square using a sharp hand chisel.