Miter sawing: tips for a splinter-free corner
Neatly joining two wooden parts in a corner is one of the most common challenges when finishing a home. Whether it involves installing baseboards, making a picture frame, or mounting cover trims: a sloppy corner joint with gaps or frayed edges instantly ruins the entire appearance.
The basis of a tight corner joint is miter sawing. This means that you saw the ends of two materials at an angle, so that they fit together seamlessly. Although a standard corner is often 90 degrees – which requires two cuts of exactly 45 degrees – practice in the home usually deviates from this. In reality, walls are rarely exactly square. In this article, you will read how to calculate the exact angle, how to prevent splinters in the wood, and how to ensure a tightly fitting joint.
[!TIP] Are you still looking for the right tools to carry out this job accurately? Then check out the necessary tools beforehand to prevent measurement errors and material waste.
1. The basics: how do you calculate the angle for miter sawing?
To determine the correct angle, you cannot blindly rely on the standard 45 degrees. It is important to first measure the total angle of the wall or object.
For this, you use a sliding bevel (also called a bevel gauge) or a digital angle finder. Place the sliding bevel tightly into the corner, tighten the screw, and transfer the angle. Do you have a digital angle finder? Then you can read the exact angle directly.
The formula to calculate the saw angle is simple:
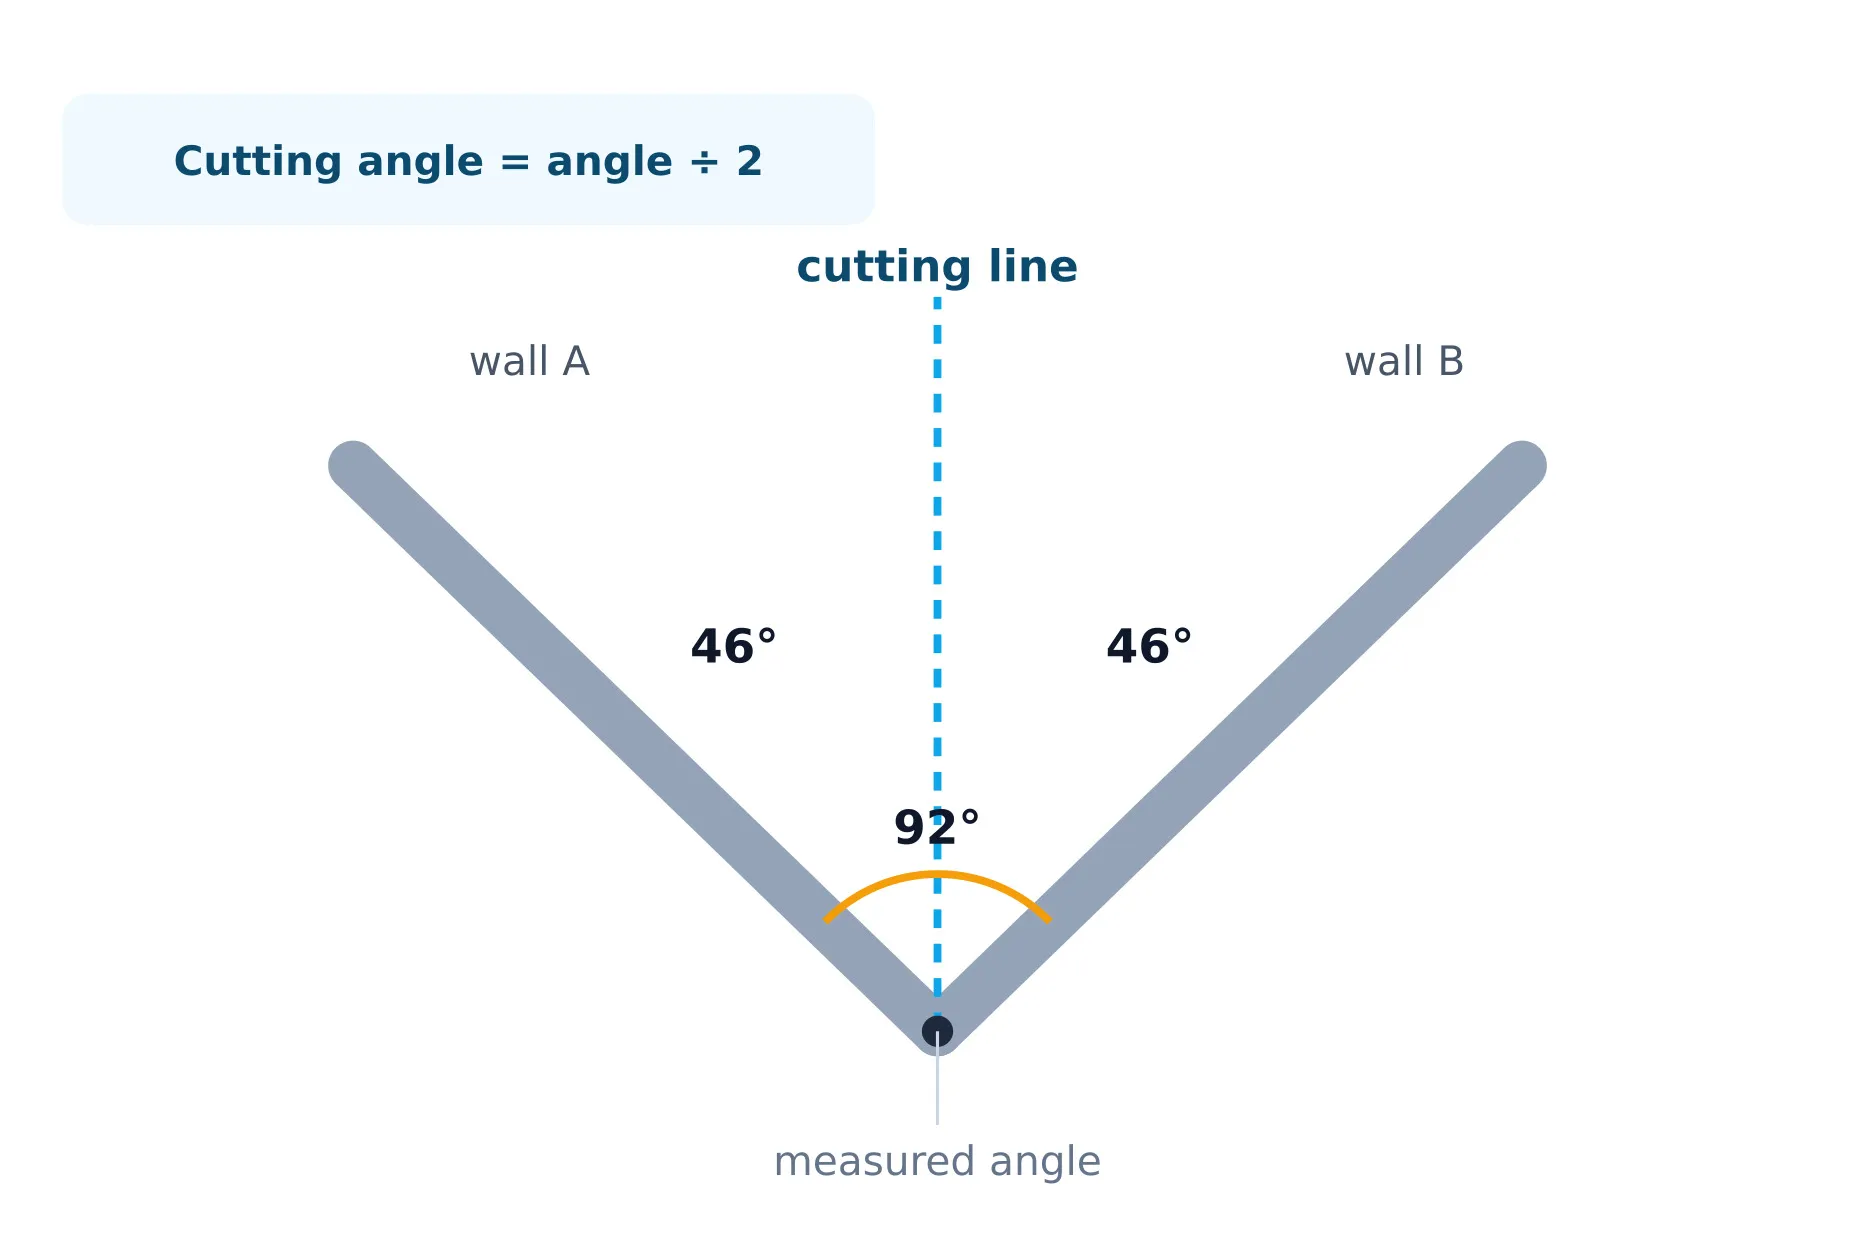
Saw angle = Measured angle / 2
For example, if the angle of the wall is 92 degrees (a slight deviation from the standard 90 degrees), you divide this by two. In this case, you set the miter saw to exactly 46 degrees instead of 45 degrees.
| Measured angle (wall) | Required saw angle per part |
|---|---|
| 90° (square) | 45° |
| 92° (obtuse angle) | 46° |
| 88° (acute angle) | 44° |
Practical takeaway: Always measure each corner individually; walls in both new builds and older properties almost always deviate from the theoretical 90 degrees.
2. Inside corner and outside corner with baseboards: the logic of mirroring
When sawing baseboards, you quickly run the risk of sawing in the wrong direction. It is crucial to understand the difference between an inside corner and an outside corner and to mirror the baseboards correctly.
- Inside corner: This is a corner that points inwards (like the corners of a standard room). With an inside corner, the back of the baseboard (which goes against the wall) is always the longest part. The visible side is shorter.
- Outside corner: This is a corner that points outwards (for example, around a chimney breast or a protruding wall). With an outside corner, the back of the baseboard is the shortest part, and the visible side extends further.
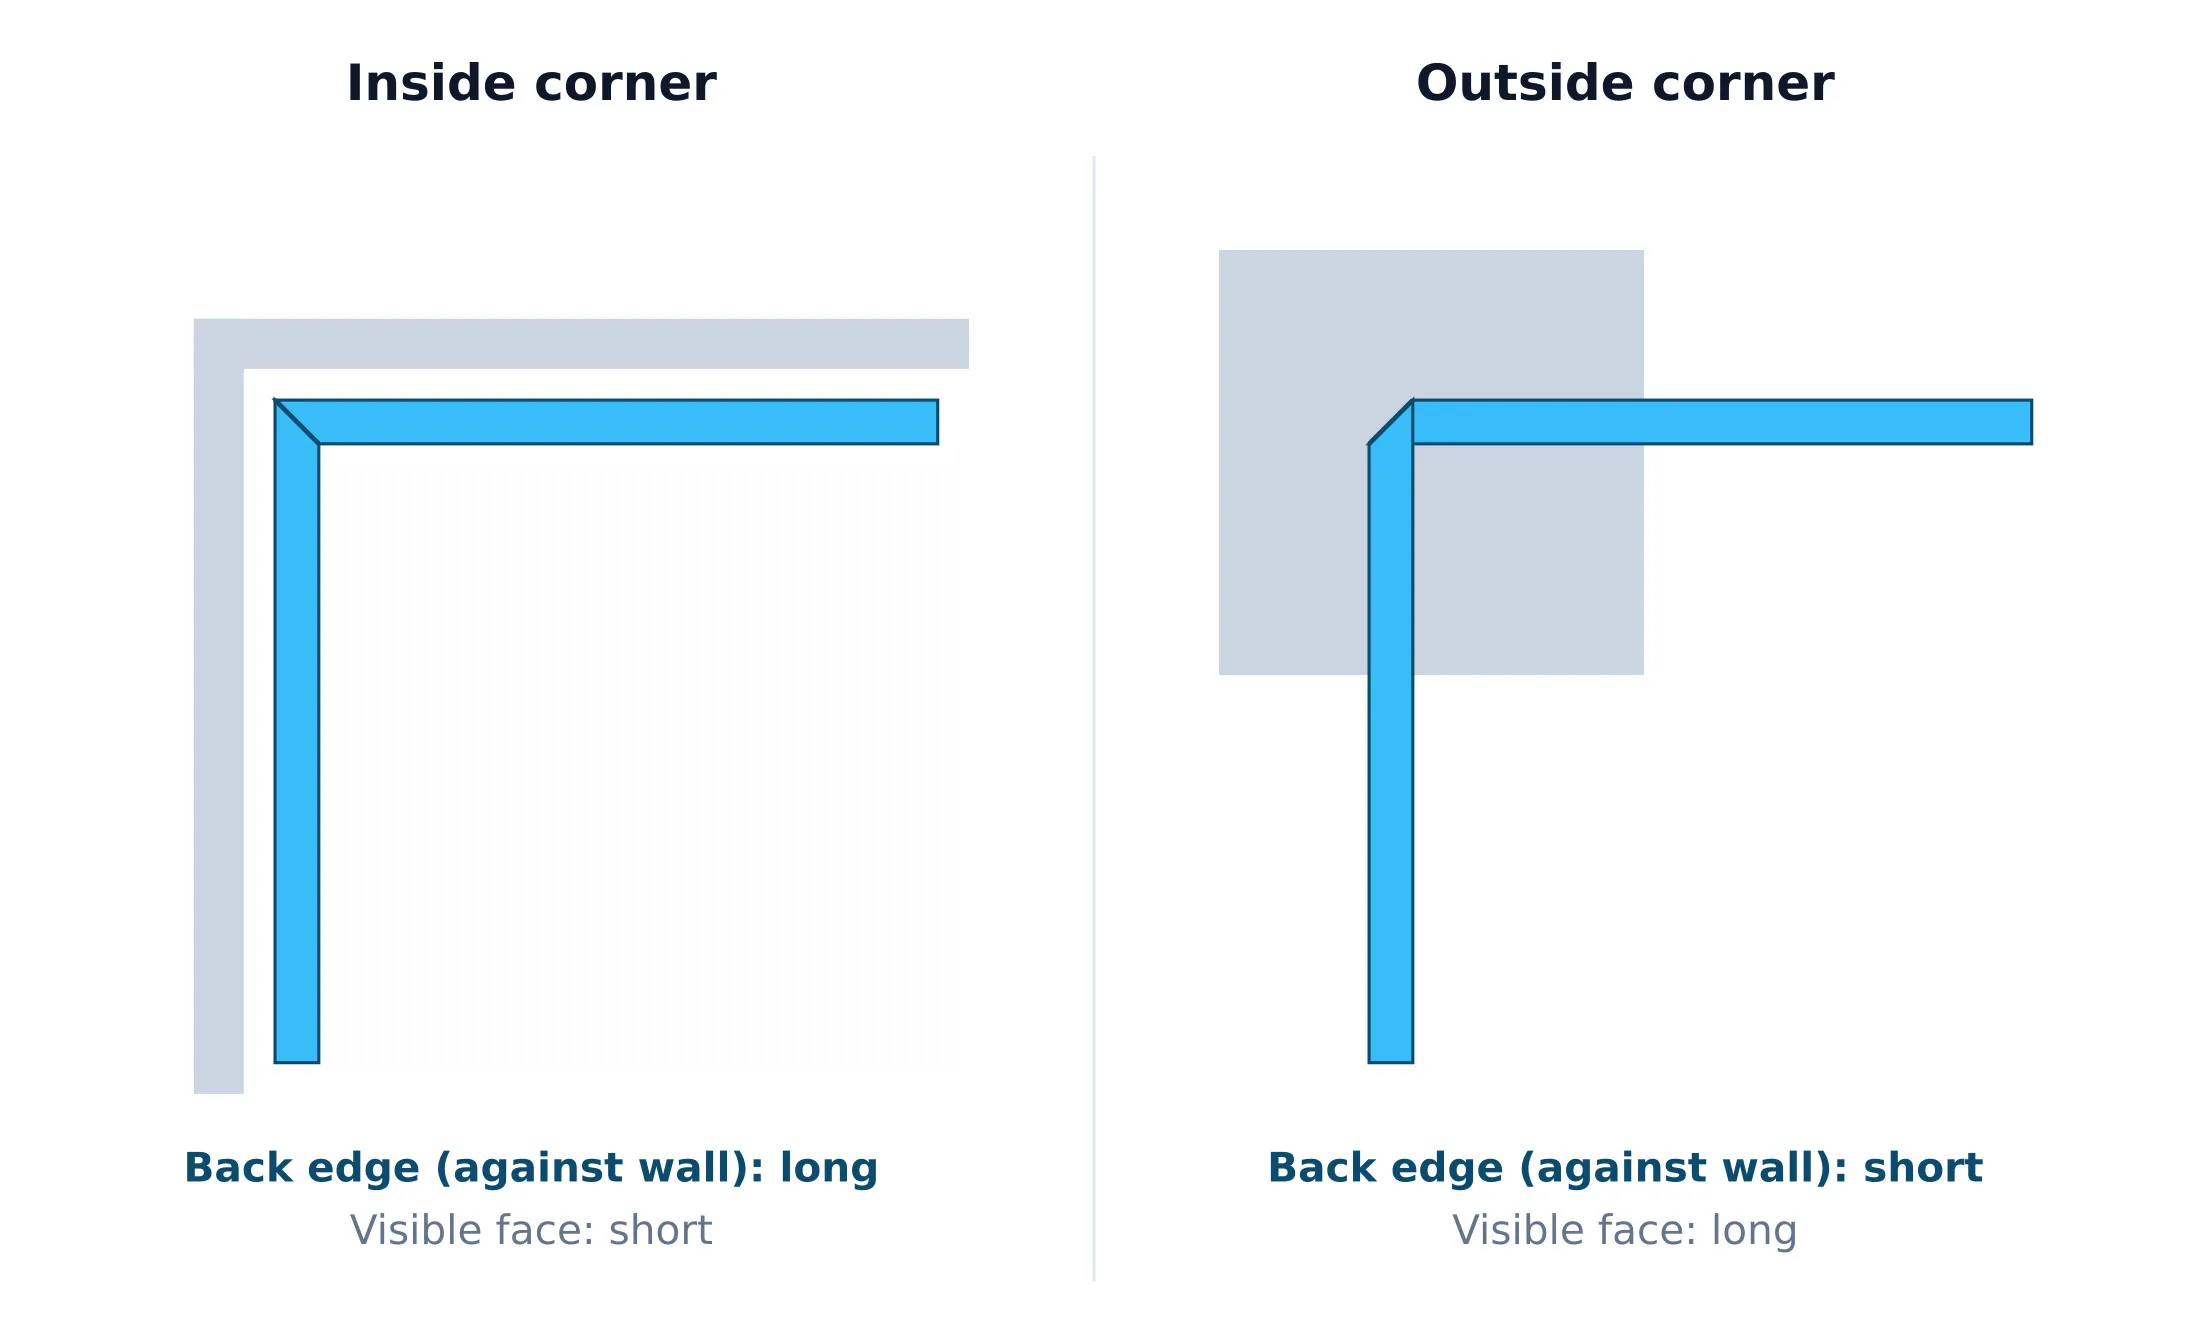
To prevent mistakes, it helps to draw a small guide line with a pencil on the top of the baseboard in the direction the cut should run. This way, you can see at a glance whether you need to tilt the saw head to the left or to the right.
Practical takeaway: Always rough out the saw direction first with a pencil on the baseboard before turning on the saw.
3. Step-by-step guide: splinter-free miter sawing
Splinters and frays at the cut can still make a joint look sloppy. With the right technique and preparation, the top layer of the material remains intact.
Step 1: Choose the right saw blade
For a splinter-free result in wood or MDF, a fine-toothed saw blade is essential. Preferably use a circular or miter saw blade with at least 72 teeth. The more teeth the blade has, the lower the chance of fiber breakout.
Step 2: Tape off the saw line
Apply sturdy masking tape over the spot where the cut is to be made and mark the final saw line on it. The tape holds the wood fibers or the foil of laminated MDF in place during sawing, which significantly reduces the chance of splinters.
Step 3: Position the material correctly
Take the rotation direction of the saw blade into account.
- With a miter saw, the teeth cut from top to bottom at the front. Therefore, place the baseboard with the visible side facing up on the saw table. Any splinters will then occur at the bottom and back, which are out of sight.
- Are you using a jigsaw (with an upward-cutting pendulum blade)? Then place the baseboard with the visible side facing down to prevent splintering on the front.
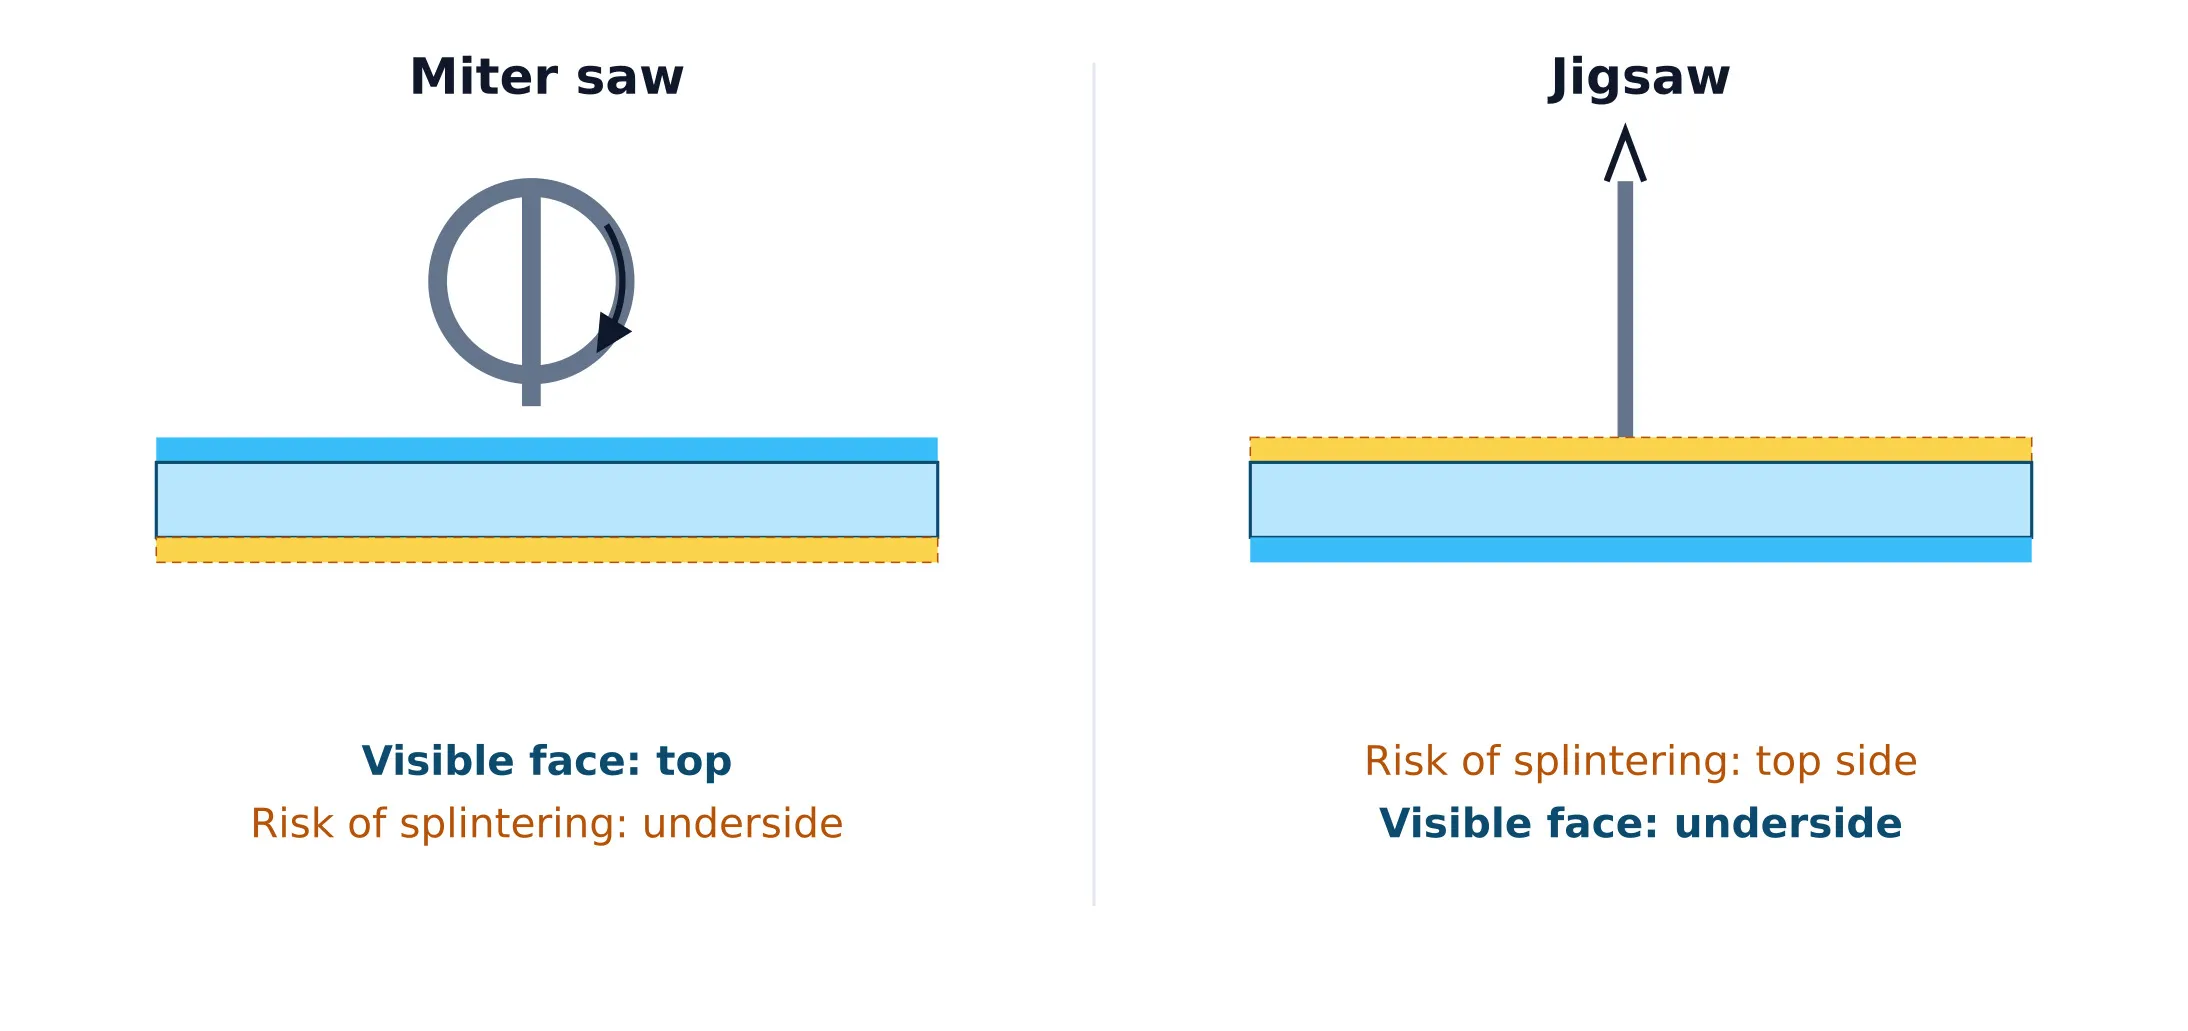
Step 4: Secure the workpiece
Ensure that the material cannot shift during sawing. Use the clamps of the miter saw or secure the material to the workbench with G-clamps.
Step 5: Saw with a constant, gentle motion
Let the saw reach full speed before touching the material. Push the saw through the wood without much force and in a smooth motion. Sawing too fast forces the fibers and causes immediate splinters.
Practical takeaway: Combine a fine-toothed saw blade (72T+) with masking tape on the saw line for the cleanest cut.
4. Sawing baseboards in miter without a miter box
Don’t have a miter box or electric miter saw at hand? You can also saw a baseboard in miter manually by marking it out accurately.
- Measure the height of the baseboard (for example, 70 mm).
- Mark out a square: measure the same distance as the height (70 mm) from the end of the baseboard and draw a straight line across the width. You have now drawn an imaginary square on the top of the baseboard.
- Draw the diagonal. Use a pencil and a ruler to draw a diagonal line from one corner of the square to the opposite corner. This is an exact 45-degree angle.
- Extend the line vertically. Extend the line straight down on the front and back of the baseboard using a try square.
- Sawing by hand. Use a fine tenon saw or hand saw and follow the drawn lines accurately. Saw calmly and adjust where necessary.
Practical takeaway: Without tools, the thickness of the baseboard is the key to manually marking out an exact 45-degree angle.
5. What is a compound miter?
A compound miter has two meanings in woodworking. On one hand, we speak of a compound miter when the angle of the wall deviates from 90 degrees (requiring you to saw at 46 degrees, for example). On the other hand, a compound miter occurs when you join two parts of different widths or thicknesses. Because the materials are not equal, the saw angles of both parts must be unequal to still form a perfectly fitting corner (for example, a cut of 42° on one part and 48° on the other part to form a 90° angle together).
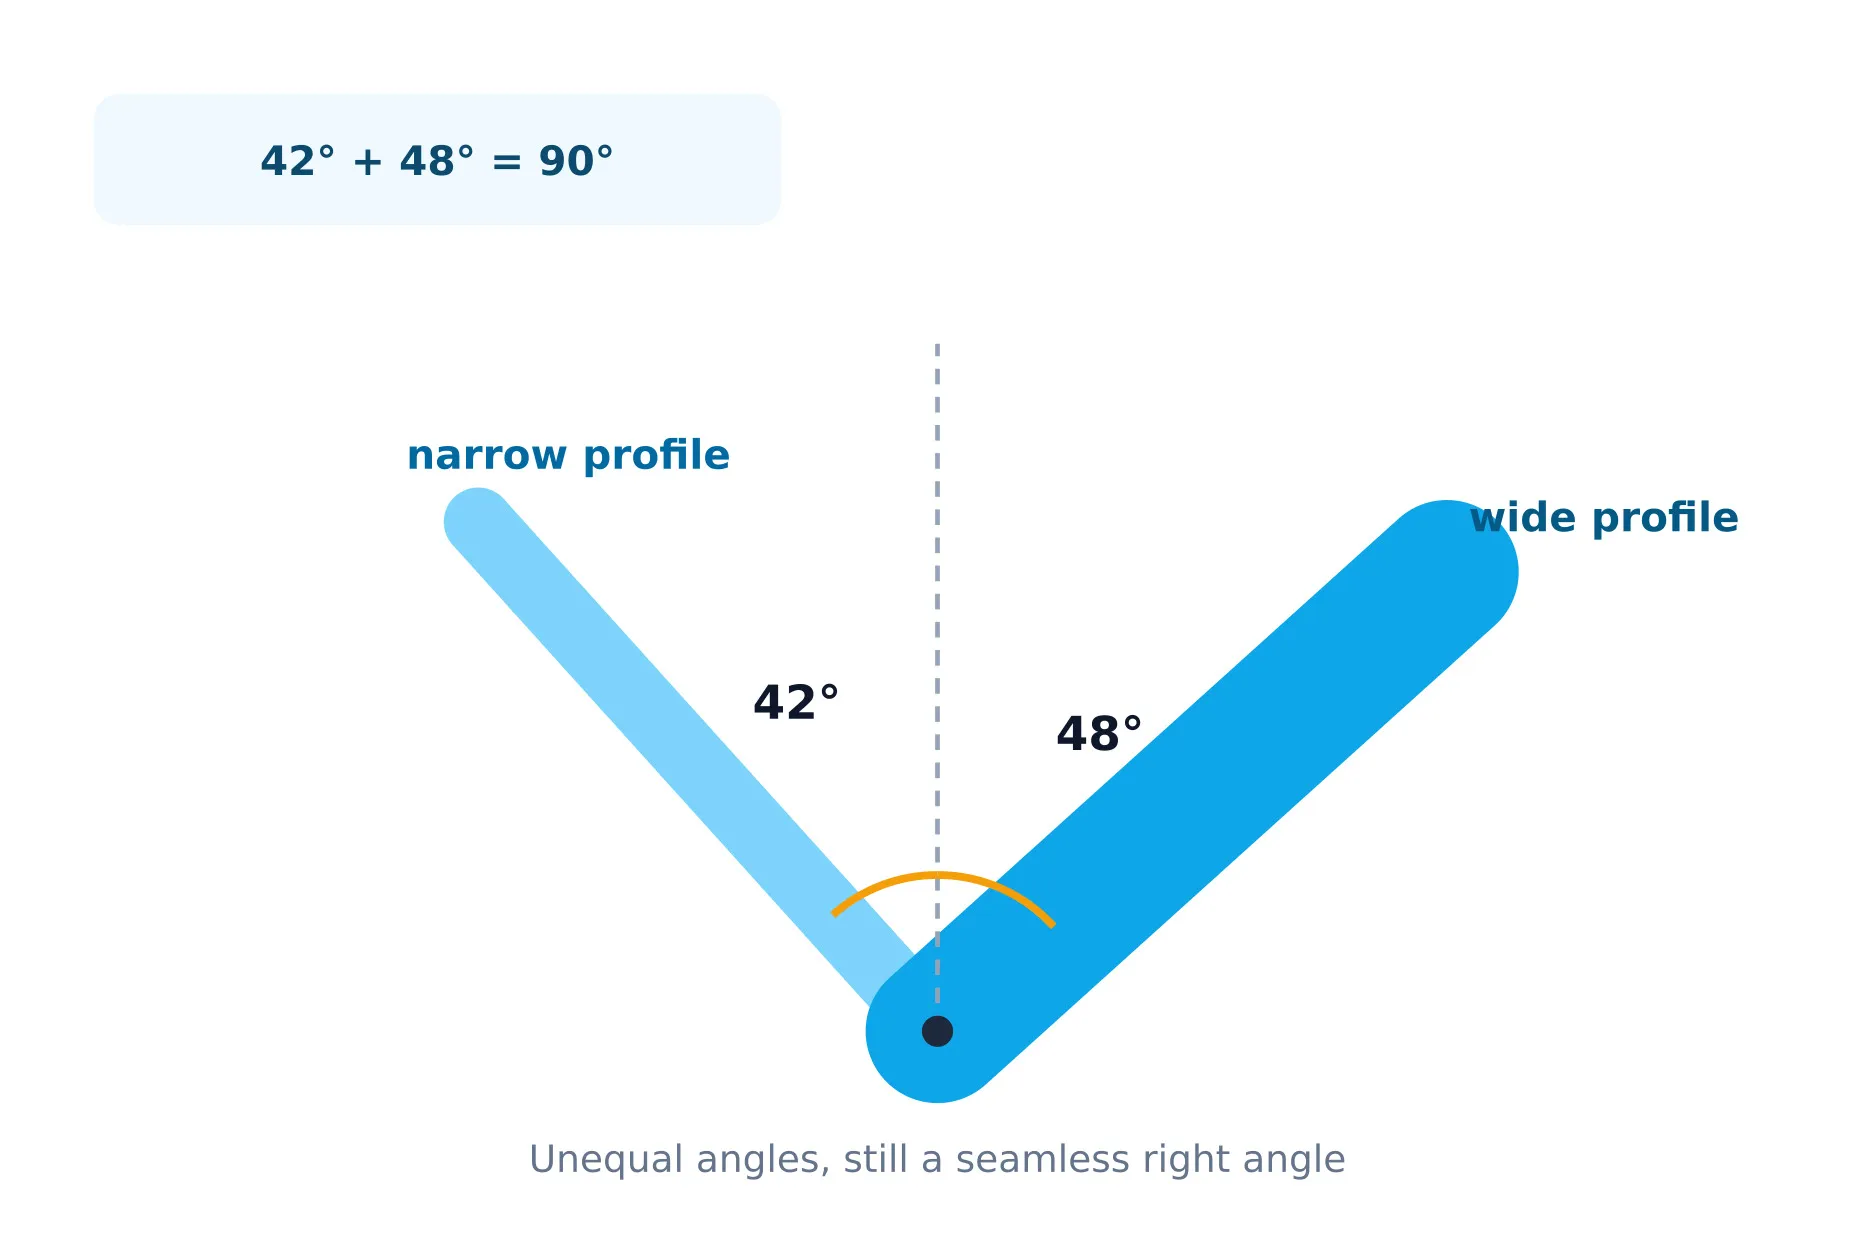
When sawing a compound miter, the method is as follows:
- Measure the angle with a sliding bevel.
- Determine the differences in width or thickness between the two wooden parts.
- Calculate the individual, unequal saw angles for both parts so that the profiles or widths align exactly on the diagonal.
[!TIP] When sawing a compound miter, always check the fit first with two scrap pieces of wood. This prevents you from ruining a long baseboard due to a small measurement error.
Practical takeaway: When in doubt, always use scrap material to test the calculated angle of the compound miter.
6. Miter sawing tiles (jolly cutting)
Not only wood, but also ceramic or natural stone tiles are miter-cut. In the tiling world, this is also known as jolly cutting. This is done to neatly finish outside corners in, for example, the bathroom or toilet without the need for plastic or aluminum corner profiles.
- Tools: This work requires an electric tile cutter with a water-cooled diamond blade that can be tilted to 45 degrees, or an angle grinder with a suitable diamond disc for fine grinding.
- The technique: Grind or saw the tile at a 45-degree angle. Make sure you do not saw all the way to the glaze layer (the visible side). Always leave a fraction of a millimeter of the original tile edge intact. If you touch the glaze layer directly with the saw, it can splinter or crumble.
- Finishing: The two tiles are placed so that the mitered edges almost touch. The remaining minimal joint is afterwards filled with grout or silicone sealant in the correct color.
Practical takeaway: When jolly cutting tiles, always stay just 1 millimeter away from the glaze edge to prevent damage to the top layer.
7. Neatly finishing a miter joint with gaps
Even with accurate measurement work, a small gap can occur due to a slight curve in the wall or the wood. Fortunately, this is easy to correct afterwards:
- For painted wood or MDF (white): Use a high-quality acrylic sealant. Apply a minimal amount into the gap, smooth it out with a damp finger or sealant spatula, and remove excess sealant immediately. Acrylic sealant is elastic and paintable.
- For transparently treated wood: Mix a bit of fine sanding dust from the same wood with transparent wood glue to form a paste. Press this mixture into the gap. After drying, sand it lightly. This makes the gap virtually invisible afterwards because the filler has exactly the same color as the wood.
- For baseboards along the wall: Gaps between the baseboard and an uneven wall are also filled with acrylic sealant before you paint the baseboards.
Practical takeaway: Small gaps are sometimes unavoidable; with acrylic sealant or a mixture of wood glue and sanding dust, you can tidy them up neatly afterwards.
8. Frequently asked questions about miter sawing
Which saw is most suitable for miter sawing?
For the fastest and most accurate result, an electric miter saw (with miter function) is the best choice. For smaller jobs or thinner slats, a manual miter box with a fine-toothed tenon saw is sufficient.
Why doesn’t my 45-degree miter joint fit?
This is almost always because the angle of the wall is not exactly 90 degrees. Even a deviation of 1 degree will cause a visible gap. Measure the angle with a sliding bevel and adjust the saw angle accordingly.
How much extra material should I order for saw waste?
When miter sawing, you lose a small part of the length with each cut. When ordering or buying baseboards and profiles, take a saw waste of about 10% into account.
Can I use a jigsaw for mitering?
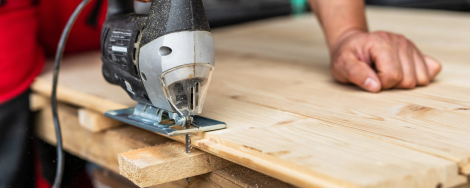
Yes, many jigsaws have a soleplate that you can tilt up to 45 degrees. However, it requires a very steady hand and a guide to get a straight cut with this. A miter saw or plunge saw with a guide rail is therefore always preferred.
[!TIP] Do you need the right precision tools after reading this guide? View our range of measuring tools and sawing machines to get off to a good start straight away.