Materials
- Corrugated sheets
- Corrugated sheet nails or screws
- Ridge pieces
- Waterproof plywood slats of 18 x 94 mm for the bargeboards
- Screws (3 x 40 mm) for the bargeboards
Tools
- Hammer
- Screw drill
- Carpenter’s pencil
- Tape measure
- Handsaw
- Household stairs or ladder
- Work gloves
Types of corrugated sheet

The three most commonly used corrugated sheet materials are bitumen, PVC and polycarbonate. Bitumen is the strongest material. PVC or polycarbonate corrugated sheets are lighter in weight, making them easier to process. In addition, they are available in a transparent version that allows daylight to pass through.
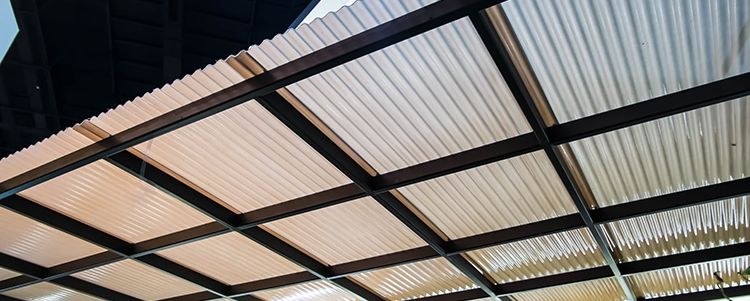
Making a corrugated sheet roof in 7 steps
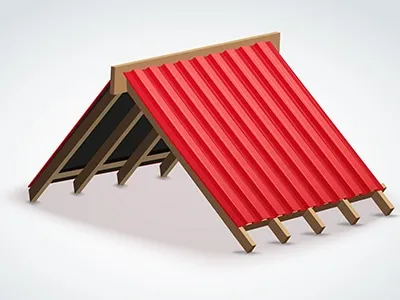
1. Install the supporting construction
The distance between the battens on which the corrugated sheets are attached depends on the angle of inclination of the roof and the material of the corrugated sheets. With a distance of 60 cm you are in most cases ok. At the hardware store where you buy the corrugated sheets, they can advise you on the best supporting construction for your project. The slope of the roof must be at least 10 degrees, which means a slope of 17 cm per meter.
2. Calculate how many corrugated sheets you need
Calculate the number of corrugated sheets you need and take into account the overlap. The corrugated sheets must overlap at least 15 cm in length and the overlap in width is at least a complete corrugation.
3. Place the first two corrugated sheets
Place the first corrugated sheet at the bottom right or bottom left on the roof. Leave the sheet protruding a few centimeters at the bottom and on the side. Then place the corrugated sheet above it and allow it to overlap at least 15 cm. Now first hit a nail in the second and second to last corrugation to see if the sheets are square. If so, secure them further with the corrugated sheet nails: widthwise on each corrugation and lengthwise on each beam. Close the plastic protective caps on the nails to prevent leakage.
Note: Always knock the nails through the top of the wave.
Tip: for PVC corrugated sheets you prefer not to use nails, but corrugated sheet screws. Pre-drill the screw holes with a slightly larger drill bit, so that the corrugated sheet can expand.
4. Apply the following corrugated sheets
Now fix the following corrugated sheets in the same way. Finish row by row, so you don’t have to walk over the roof, because no kind of corrugated sheet material can withstand that. Keep an overlap of at least one corrugation in width. For sheets with a small corrugation, a larger overlap is recommended, count on about 30 centimeters.
5. Attach the ridge piece
If the roof has a ridge, immediately attach the first row of sheets on the other side and place the ridge piece before starting on the next row.
6. Lay the last row
You will probably have to cut the last row of corrugated sheets to size. For the strength of the construction, this closing row should consist of at least three corrugations, so you may need a larger overlap here.
7. Install bargeboards
As a protection against storm, it is wise to finish the roof on the ends with so-called bargeboards. You can easily make these from two waterproof plywood slats that you screw at a right angle to each other. Screw the bargeboards through the top of a corrugation into the roof battens.
Think about your safety. Use a good ladder or stairs and make sure it is stable. Also read our tips on working safely with a ladder.